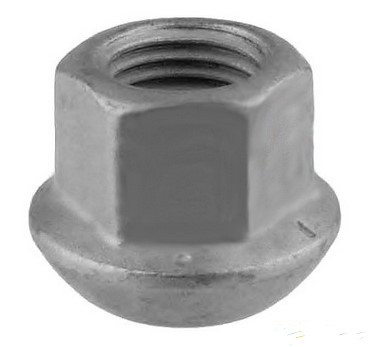
VAG Oriģinālais sešstūra atloka uzgrieznis N 90758401
Oriģinālās VAG rezerves daļas garantē nevainojamu saderību un uzticamību, kas ir kritiski svarīgi jūsu transportlīdzekļa ilgmūžībai un drošībai. Šis sešstūra atloka uzgrieznis ar detaļas kodu N 90758401 ir ražots atbilstoši augstākajiem VAG standartiem, nodrošinot precīzu piegulšanu un optimālu veiktspēju. Atloka uzgriežņa dizains ar integrētu paplāksni nodrošina lielāku kontakta virsmu ar stiprināmo detaļu, tādējādi vienmērīgāk sadalot slodzi un samazinot detaļas bojājumu risku. Tas arī palīdz novērst uzgriežņa atskrūvēšanos vibrācijas apstākļos, nodrošinot ilgstošu un stabilu savienojumu. Šis universālais stiprinājuma elements tiek plaši izmantots dažādās VAG grupas automašīnu sistēmās, sākot no šasijas un piekares komponentiem līdz dzinēja un transmisijas stiprinājumiem. Tā daudzpusība padara to par neaizstājamu detaļu gan remontam, gan apkopei.
- Oriģinālā VAG detaļa
- Detaļas kods: N 90758401
- Sešstūra atloka dizains
- Uzlabota slodzes sadale
- Paaugstināta noturība pret atskrūvēšanos
- Augstas kvalitātes materiāls
- Plašs pielietojums VAG modeļos
- Nodrošina drošu un stabilu savienojumu
Specifikācija nav atrodama